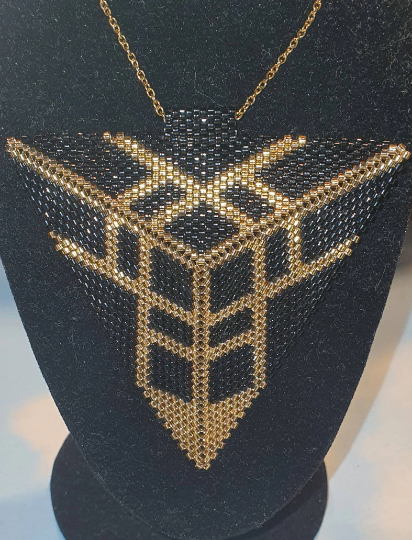
Miyuki beads are small, cylindrical beads that come in a wide range of colors and sizes. They are perfect for creating intricate and detailed patterns in jewelry making. In this comprehensive guide, we'll explore some of the most popular Miyuki bead patterns and designs.
Peyote Stitch
The peyote stitch is a popular bead weaving technique that creates a flat, even surface with a slight stretch. To create the peyote stitch, you'll need Miyuki beads, beading thread, and a beading needle. Start by adding a row of beads and weaving the needle back through the beads to create a foundation row. Then, add additional rows of beads, weaving the needle through both the new beads and the previous rows to create the peyote stitch.
Brick Stitch
The brick stitch is a versatile bead weaving technique that can be used to create a variety of shapes and designs. To create the brick stitch, start by adding a row of beads and weaving the needle back through the beads to create a foundation row. Then, add a second row of beads, but instead of weaving the needle through the previous row of beads, pass it under the thread between the beads in the first row. Continue adding rows in this way to create the brick stitch.
Herringbone Stitch
The herringbone stitch is a bead weaving technique that creates a flexible and fluid design. To create the herringbone stitch, start by adding two beads and then passing the needle back through the first bead. Then, add a third bead and pass the needle through the second bead. Continue adding beads in this way to create the herringbone stitch.
Loom Weaving
Loom weaving is a popular technique for creating intricate and detailed patterns using Miyuki beads. To create a loom-woven design, you'll need a bead loom, warp threads, Miyuki beads, and a beading needle. Start by attaching the warp threads to the loom and then add the Miyuki beads using the beading needle. Weave the beads over and under the warp threads to create the pattern. When you're finished, tie off the beading thread and cut the warp threads.
Right Angle Weave
Right angle weave is a versatile bead weaving technique that can be used to create a variety of shapes and designs. To create the right angle weave, start by adding four beads and then passing the needle through the first three beads to create a triangle. Then, add a new bead and pass the needle through the bead that's opposite the one you just added. Continue adding beads in this way to create the right angle weave.
Tips for Creating Miyuki Bead Patterns and Designs
Here are some tips for creating beautiful and intricate patterns and designs with Miyuki beads:
Choose the right size beads: Miyuki beads come in a wide range of sizes, so choose the size that's right for your project. Size 11/0 and 8/0 are popular choices for bead weaving.
Experiment with different colors: Miyuki beads come in a wide range of colors, so experiment with different color combinations to create unique and personalized designs.
Use graph paper: To create intricate patterns, use graph paper to map out your design before you start beading.
Practice your technique: Bead weaving techniques can take some practice, so start with a simple design and work your way up to more complex patterns.
Conclusion
Miyuki beads are perfect for creating beautiful and intricate patterns and designs in jewelry making. Whether you prefer bead weaving or loom weaving techniques, there are endless possibilities for creating unique and personalized jewelry pieces with Miyuki beads. Experiment with different sizes and colors to create one-of-a-kind designs that you'll love to wear or give as gifts.
Links
About Us
Our product
Gallery
Blog
Contact Us
Cookie Notice
Terms And Conditions
Service & Security Highlights
About
London Miyuki All rights reserved.
ZeplinGo® | Website Design Prepared with.


